Creating a Breakable Window
Description
A window is much like a standard fracturable piece but with the added property that the edges should stay glued to frame. DinoFracture provides an out-of-the-box simple way to do this via the Glue Edge On Fracture component.
The end result of this tutorial will look like:
Create the Basic Scene Setup
- Create a new blank scene.
- Add a window frame from either a custom mesh or 4 scaled cubes. It does not matter where in the scene it exists.
- Add a window pane inside the frame from either a custom mesh or a scaled cube. It does not matter where in the scene it exists.
- We are going to fire a projectile to break the window. Add a blank game object to handle the projectile script.
- Add a projectile prefab.
- A simple sphere with a rigid body and collider will do.
- Set the rigid body mass to 2.
- Give the sphere a unique layer (Ex: Add a "Projectile" layer and assign it).
- Optionally add wall surrounding the frame.
- Style the scene to your liking. It does not matter if the window is transparent.
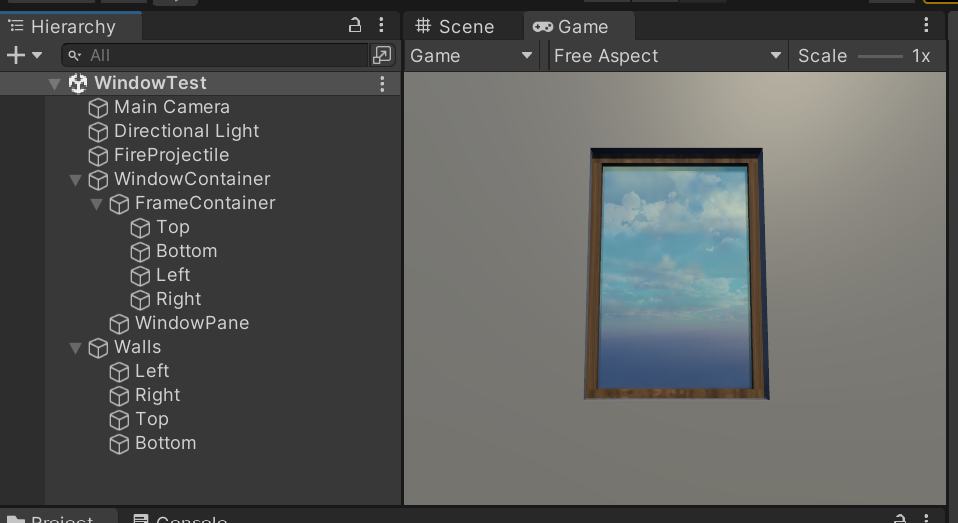
The scene should now look similar to:
Adding the Projectile Firing Component
- Add a new script asset to the project with the following code: using System.Collections;using System.Collections.Generic;using UnityEngine;public class FireProjectile : MonoBehaviour{public GameObject ProjectileTemplate;public float ProjectileSpeed = 10.0f;void Update(){if (Input.GetMouseButtonDown(0)){Fire(Camera.main.ScreenPointToRay(Input.mousePosition));}}private void Fire(Ray ray){GameObject cannonBall = Instantiate(ProjectileTemplate, ray.origin + ray.direction.normalized * 0.1f, Quaternion.identity);cannonBall.GetComponent<Rigidbody>().velocity = ray.direction.normalized * ProjectileSpeed;}}
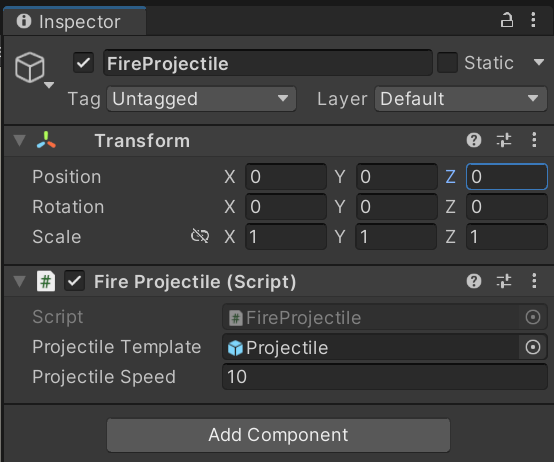
- Add the FireProjectile script to the projectile game object and set the template to the projectile prefab
If you run the scene now, you should be able to click on the game window to spawn a projectile. The window will not break at this point.
Adding the Fracture Geometry Component
- On the window pane, add a Runtime Fractured Geometry component
- Add a Fracture On Collision component to the window pane. This will allow the window to break when hit by the projectile.
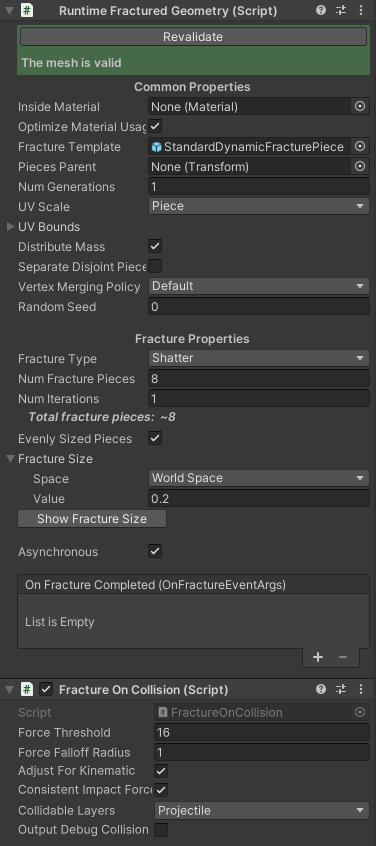
- Set the Force Threshold to 16 and the "Collidable Layers" to the layer of the projectile (Ex: "Projectile"). Filtering down the collidable layers ensures that the window pieces cannot spawn additional fractures with themselves as they break.
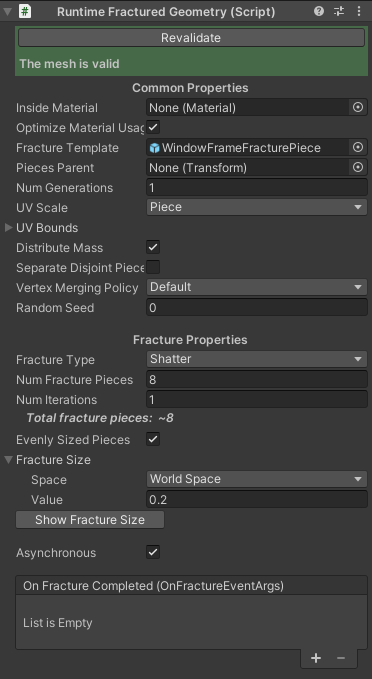
- In the Fracture Type section, ensure "Shatter" is selected.
- Set Num Pieces to 8 and Num Iterations to 1
- Expand Fracture Size. Set Space to World Space and Value to something that is a bit larger than the projectile (Ex: 0.2 if the radius of the projectile is 0.1). By setting the value to a positive, non-zero number, fractures will be clustered around the point of collision.
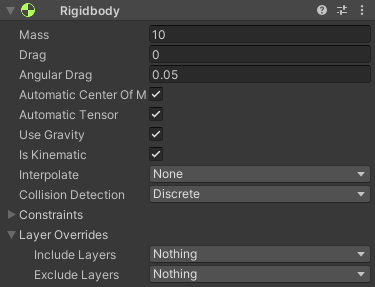
- Add a Unity RigidBody component to the window pane game object.
- Check the Is Kinematic box. This will ensure the window pane does not move when the scene starts.
- Set the rigid body mass to 10. When the window pane is fractured, DinoFracture will automatically distribute the mass proportionally to all the fracture pieces.
If you run the scene now, the window will break, but no pieces will stick to the edge. It'll feel like the window was just resting in the frame instead of being embedded in it.
Gluing Window Pane Edges
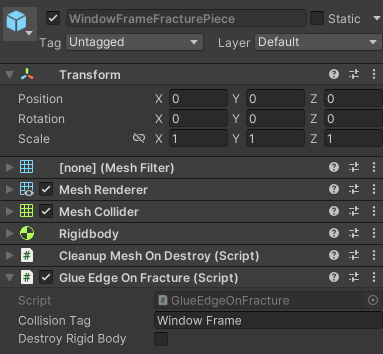
To glue the edges, we need to add a Glue Edge On Fracture component to the Fracture Template of the fracture geometry. The fracture template is a prefab that will be used as a template for each generated fracture piece.
- Create a new tag that called "Window Frame". This will be used to identify objects that the window can glue to.
- Create a duplicate of the Glue Edge Fracture Piece prefab in the DinoFracture/Plugin/Prefabs folder and rename it to "WindowPaneFracturePiece".
- This prefab is the same as the default Standard Dynamic Fracture Piece with the addition of the Glue Edge On Fracture component.
- On the duplicated prefab, set the Tag propert of the glue edge component to "Window Frame".
- Ensure Destroy Rigid Body is not checked.
- On the window pane's Runtime Fractured Geometry component, assign the new "WindowPaneFracturePiece" to the Fracture Template property.
- Select all the window frame pieces and assign the "Window Frame" tag to them.
- Note
- The window pieces must have a collider (trigger is okay) to be identified as a glue surface candidate.
When you hit play, the scene will look like this:
The edges remain fixed! But, our window only fractures once. Let's fix that.
Fracture For Multiple Generations
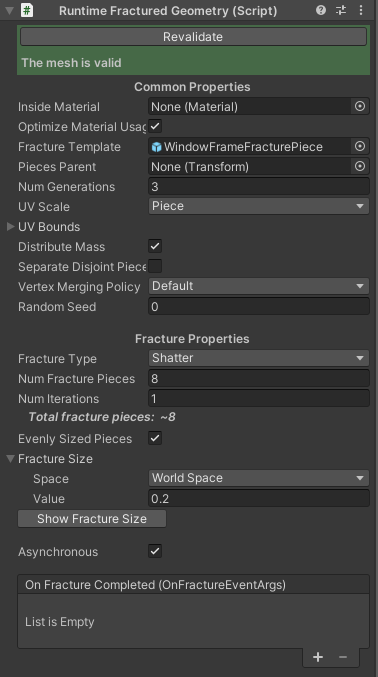
- On the Runtime Fractured Geometry component, set Num Generations to 3. This allows us to fracture each piece again, and each of those pieces once more, for a total of 3 generations.
- To support multiple generations on the fracture pieces, we need to update our fracture template prefab once again.
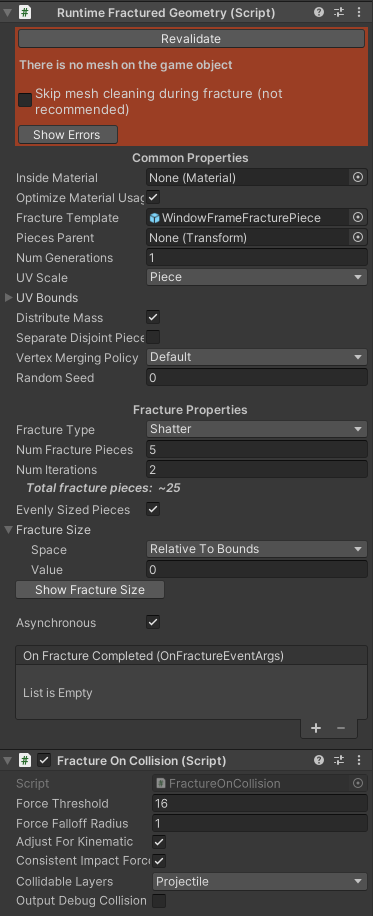
- On the "WindowPaneFracturePiece" prefab, add a Runtime Fractured Geometry component.
- Note
- You will see a warning about no mesh found on the prefab game object. This is okay as it will automatically be filled in during the fracture process.
- Set the Fracture Template on the prefab's fracture component to the prefab itself. This will allow us to recursively use the same prefab for each fracture generation.
- Finally, add a Fracture On Collision component to the prefab. Copy the parameters from the same component on the window pane game object.
- On the "WindowPaneFracturePiece" prefab, add a Runtime Fractured Geometry component.
Now only the middle parts of the window will break off, leaving the edges still connected to the window frame!